So you just opened the box and those brand new pickups are begging to be used. Where to start?
You are going to need to solder. Bummer. There is good news! Solder is nothing to be intimidated by. You can buy a cheap soldering iron and rosin core electronics solder for this project for $10 at your local hardware store.
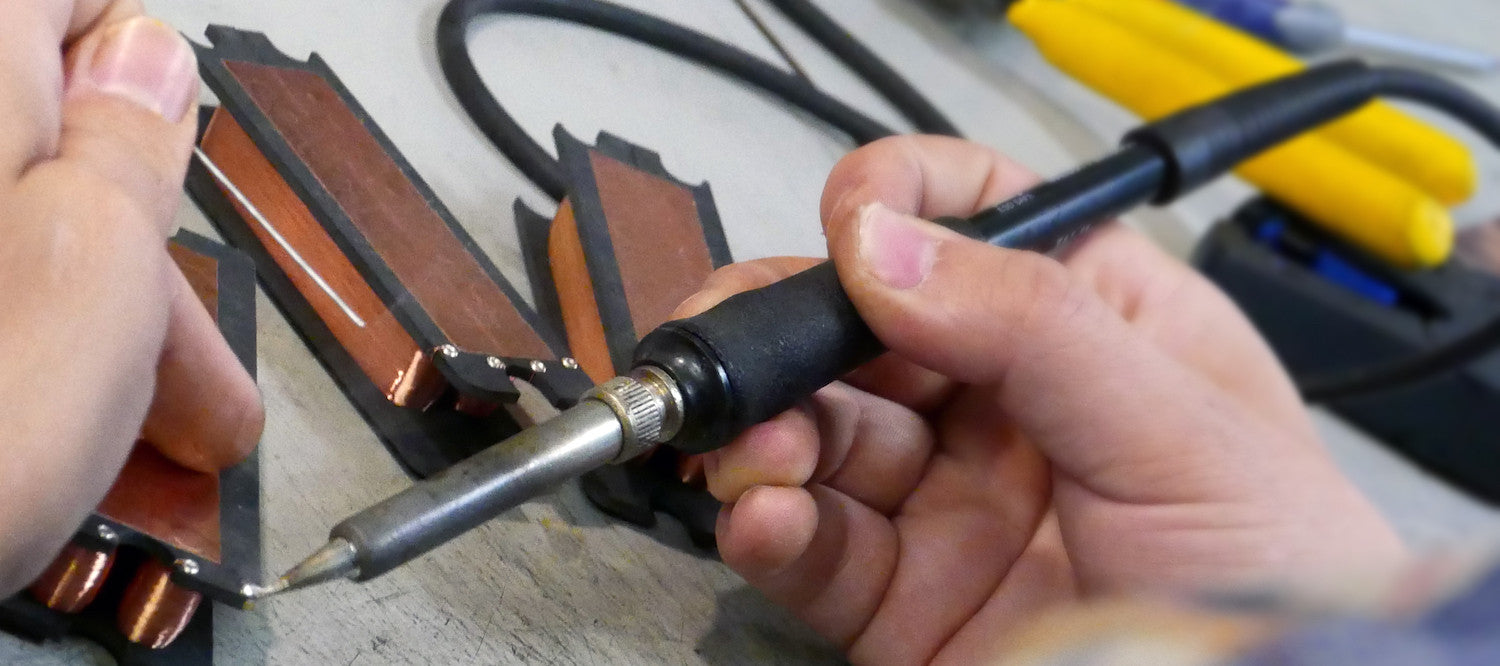
Now that you have the tools, where to start? Let that iron heat up for a good 3 or 4 minutes and melt a little solder on the tip. It’s important to keep that tip coated in a thin layer of solder to prevent it from oxidizing too fast. Once your iron is hot enough to melt the solder easily, it’s ready for action.
Heat up the place on the potentiometer where the old pickup lead wire attaches (solder joint) until the solder starts to get shiny and flow. Remove the old wire and as much of the old solder as you can and take note of what attaches where. I usually take a picture with my phone beforehand so I can reference it later.
Install the pickups in their places and route the wires where they need to go. Trim the wire to length. Make sure to leave enough wire to make it easy to work on, but not so much that you need to coil it up inside the control cavity. Strip the wire ends and heat up the wire and touch the heated wire with the solder to get a small layer of solder on the end. This is called tinning. Tin the solder lug on the pot as well. All connecting pieces should be tinned prior to connecting. This cleans the joint and prepares it for connection. Place the wire in the solder lug and heat the lug. Touch the solder to wire and lug until the hole on the lug is full and tinned end of wire is attached.
Wait for the new solder joint to cool, about 10 seconds and let go. If the the joint looks shiny and has no holes, you have success!
Some tips:
- Never touch the solder to the iron and transfer that solder to your work. That’s a sure way to get a “cold joint” that will inevitably fail at the exact wrong moment.
- Don’t be afraid of heat, but be aware you may melt components if the iron on them too long. Pre-tinning helps with this. You will quickly figure out how long you need to hold the iron on the lug to melt the solder. Most of the wire we use (excluding 4 conductor humbucker wire) is teflon or cloth coated and you cannot burn it off with a soldering iron. Do be careful when soldering switches or grounds to the back of pots. Switches and some pots have plastic components inside that will melt with too much heat.
- It’s good when the solder smokes. The smoke is the flux burning off and cleaning the connections. Use flux core electronics solder, not plumbing solder (you laugh, but I’ve seen it).
- Protect your axe. There’s nothing as disappointing as ruining the finish on your baby with a nice big fat drop of melted metal (other than your cold solder joint failing at the worst possible moment).
- Check out this YouTube tutorial from Stewmac.
Be brave and solder on!